Lead
“Lead” refers to your prospective customers who are not registered with your organization yet and who contact you for the first time.
Adding New Lead
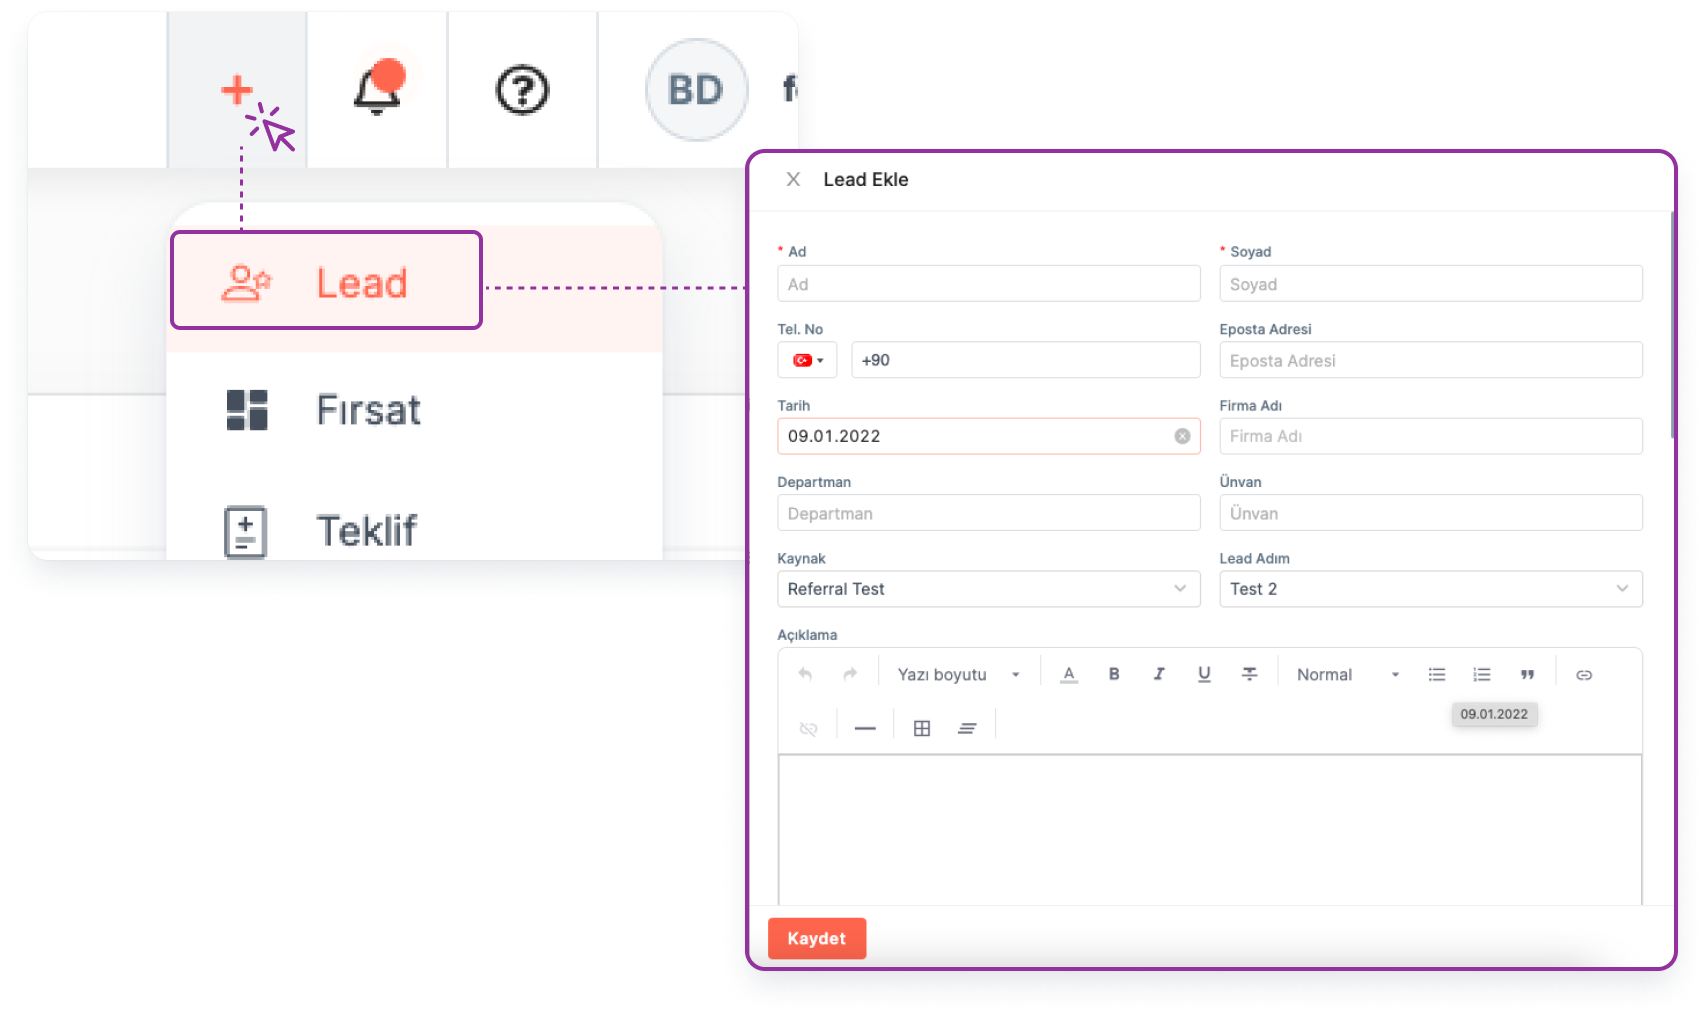
You can add leads by clicking the "Add New" button on the main menu.
Main menu > Lead > Add New
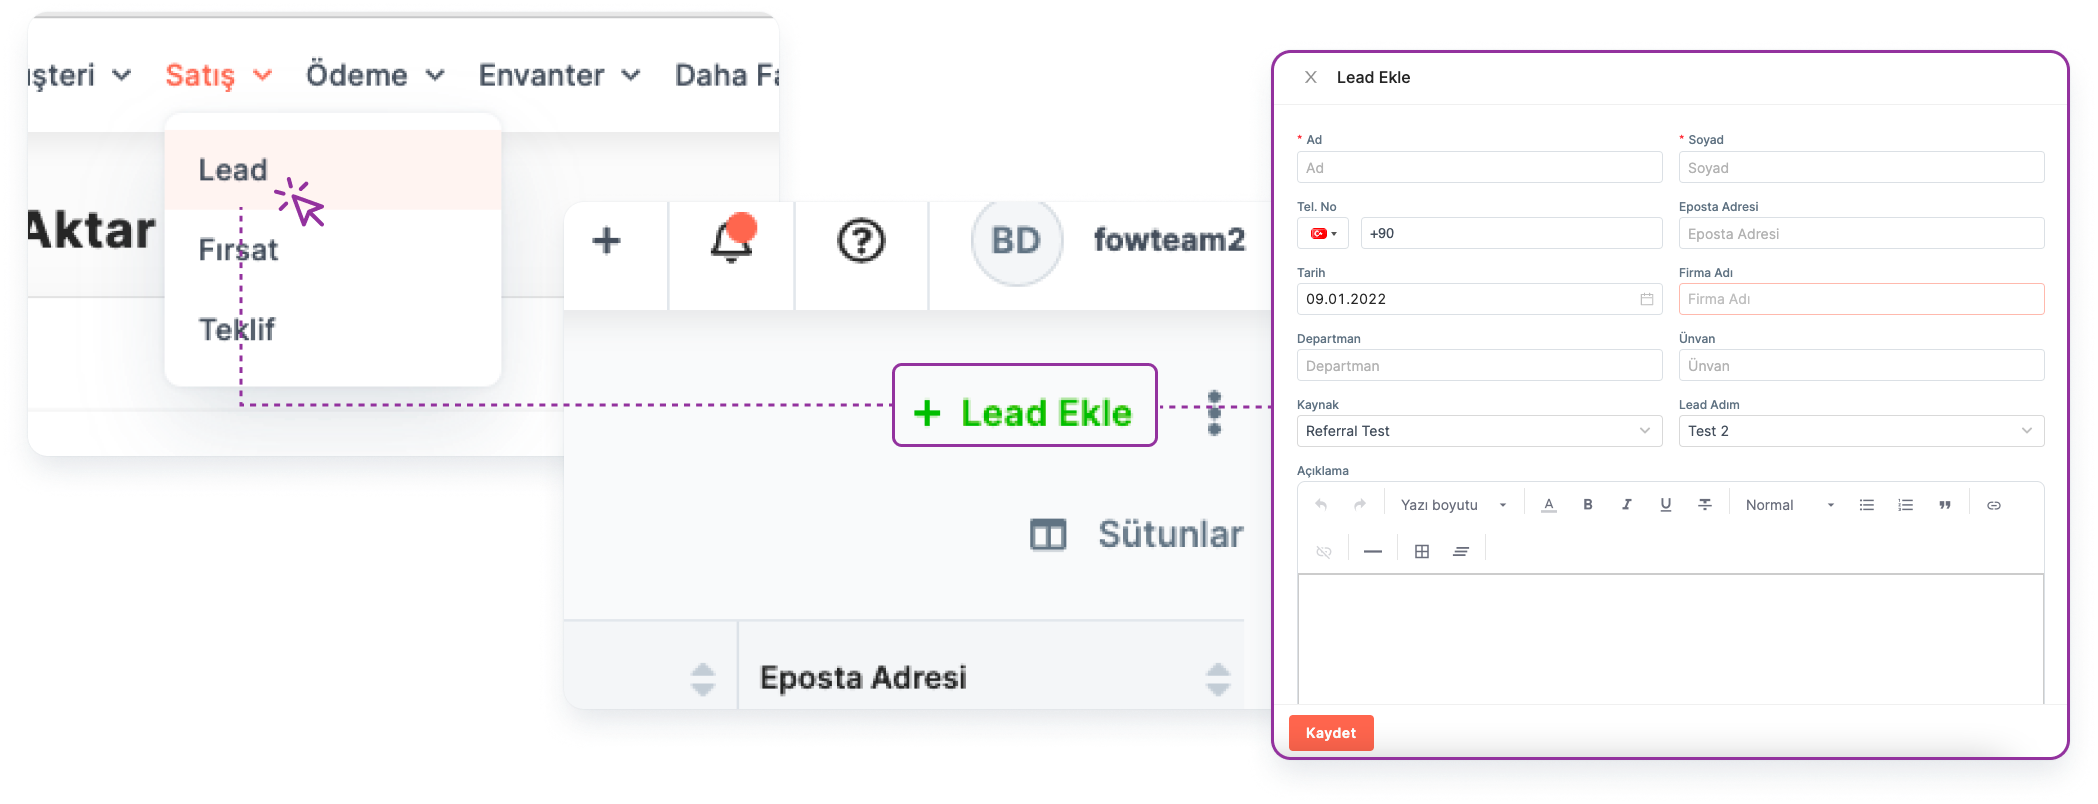
You can add a new lead by going to the "Lead" page where the leads are listed.
Main Menu > Lead > Add New Lead
*Note: While you are converting the lead, you can add an opportunity via the convert form.*
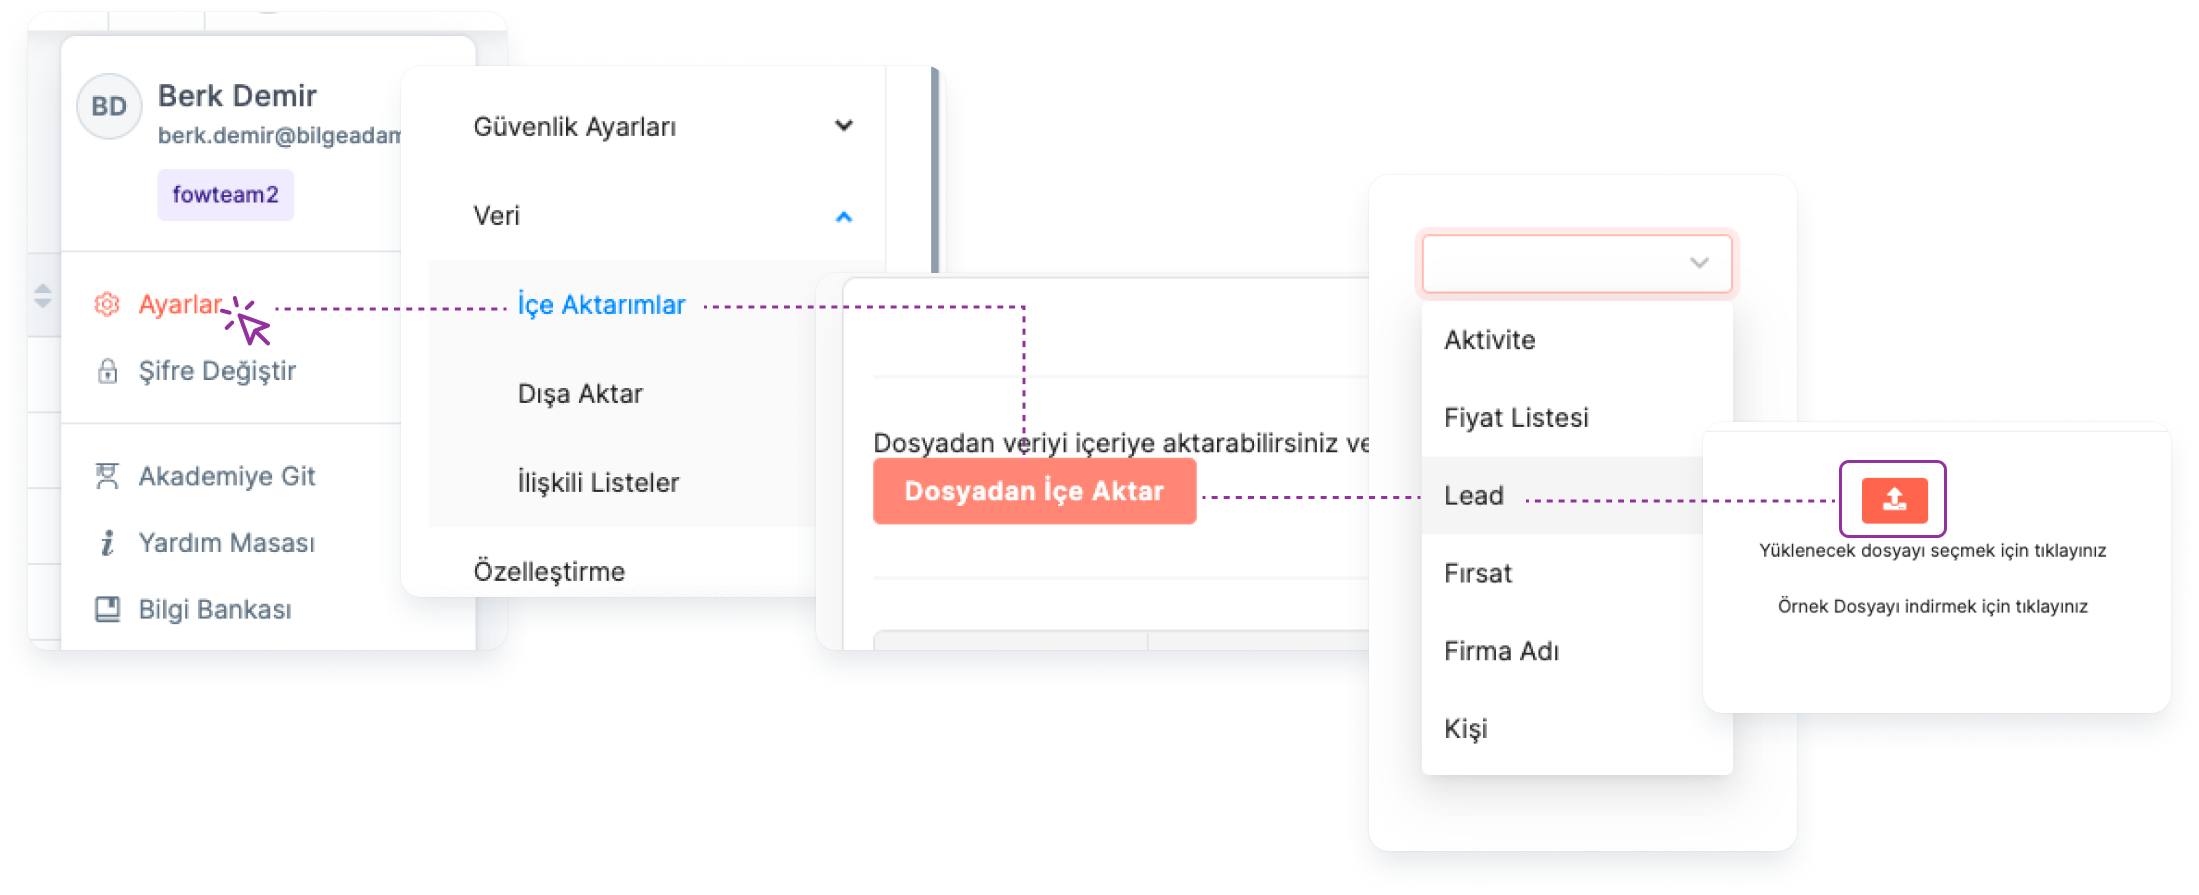
Import Lead
🔑 This operation requires admin authority.
You can add your leads in bulk under the settings menu.
Main Menu > Settings > Data > Imports > Import from File > Module Selection > Lead
Listing Added Leads
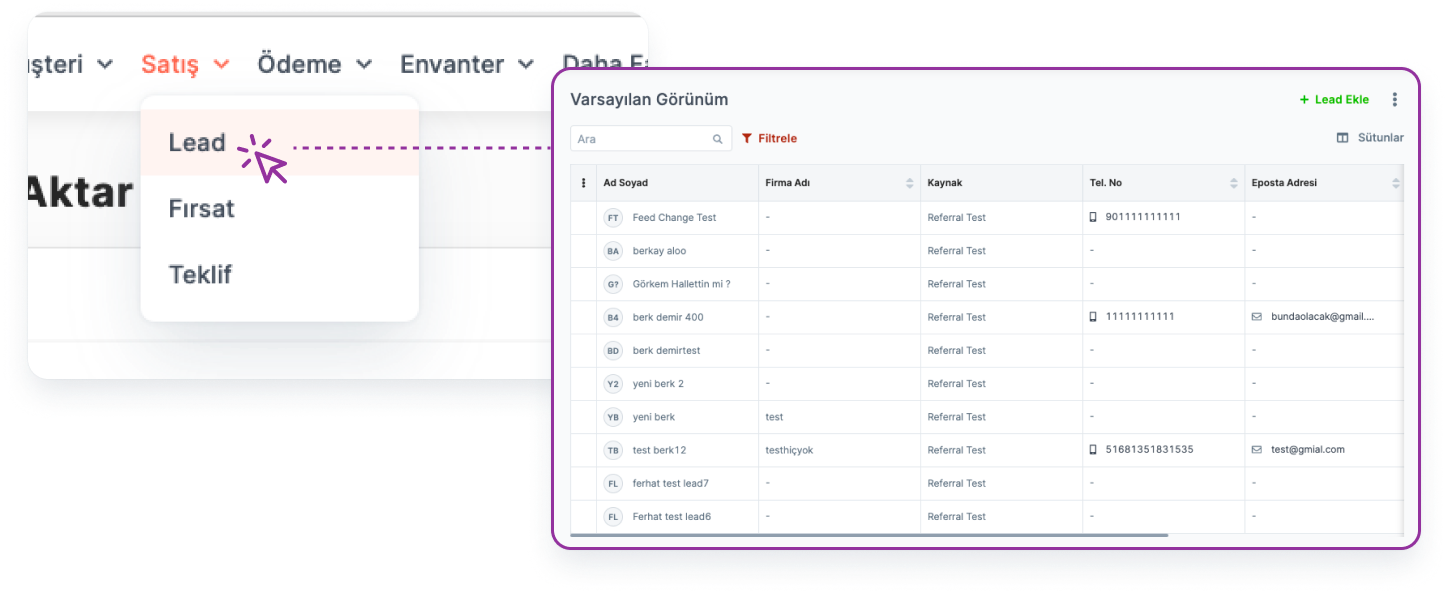
To list the leads you've added:
Main Menu > Sales Process> Lead
Column settings:
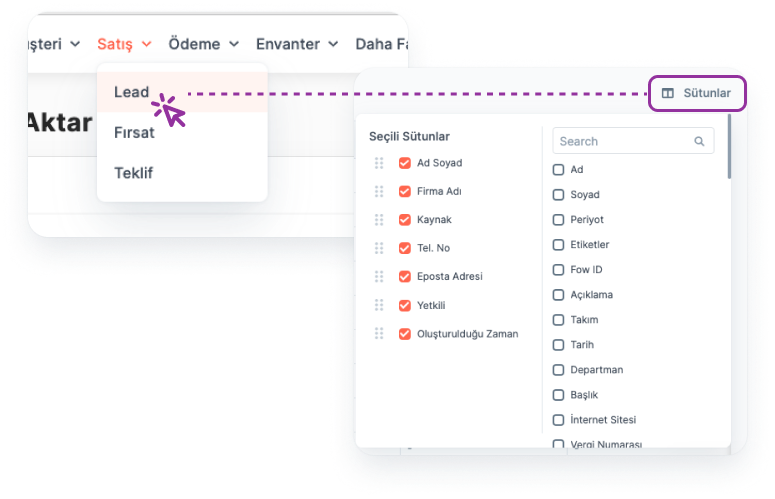
By clicking the "Columns" button, the fields listed in the Lead table can be shown, hidden or the order of their display can be changed.
More info about Filter and Views->
Searching:
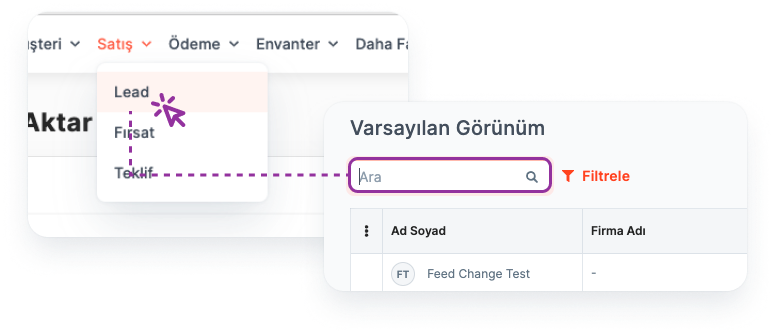
Search can be made by entering the desired word about the Lead in the search box.
Note: All columns on the Lead listing page are searched with the typed word.
Filtering:
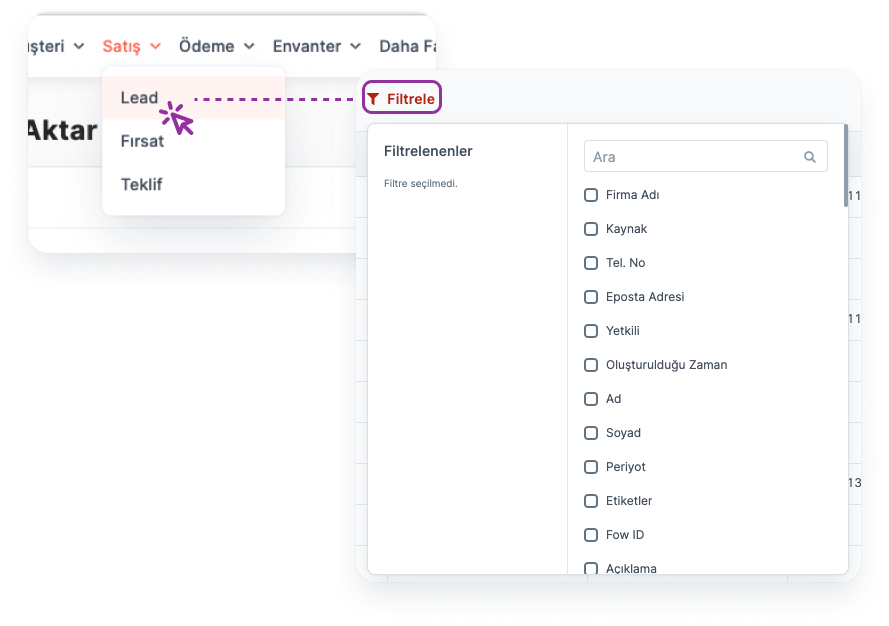
Leads are filtered by selecting the relevant field(s) from the "Quick Filter" button. For example: Leads with origin source website.
More info about Filter and View->
Export list :
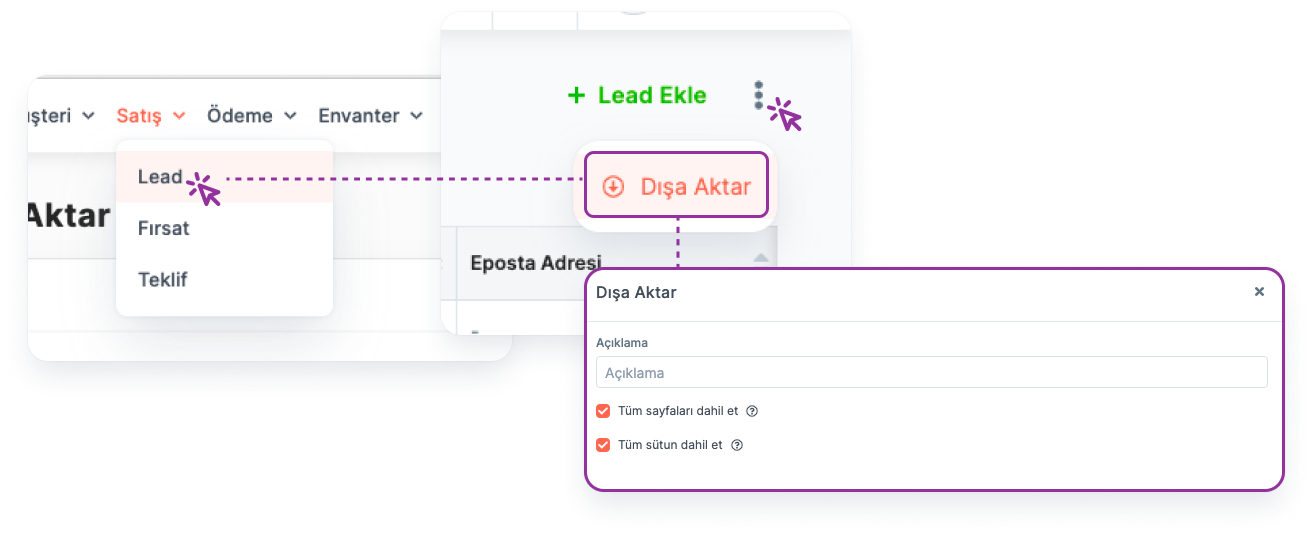
Preparing the Lead Table for "Export":
Main Menu > Lead > More > Export
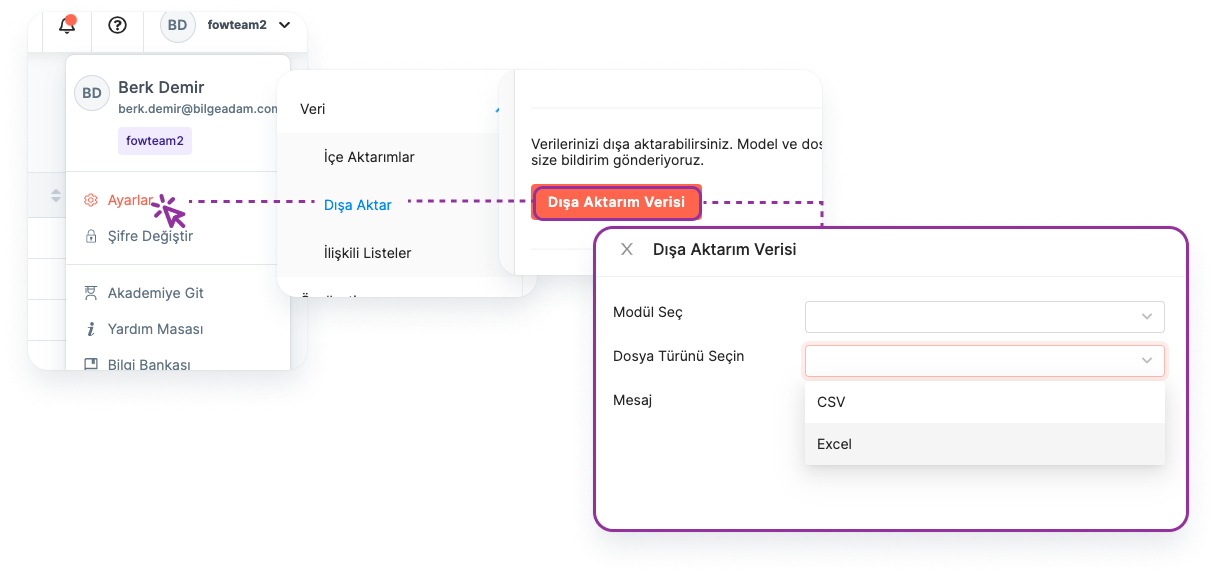
Export of Lead Table as "Excel File":
Main Menu > Settings > Data > Export > File > Download
View:
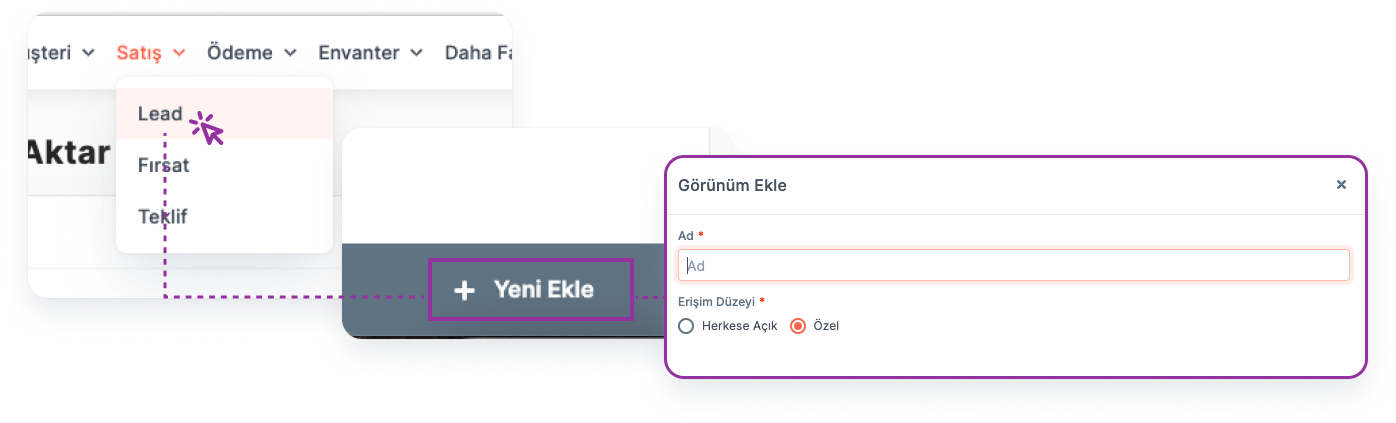
Filtering operations and column settings made on the list can be saved as "View" for quick access.
More info about Filter and View->
Lead Detail Page
All information related to the lead is available on the Lead detail page.
- Reaching Lead Details:

Lead detail is reached by clicking on Name Surname.
Main menu > Lead > Lead Header
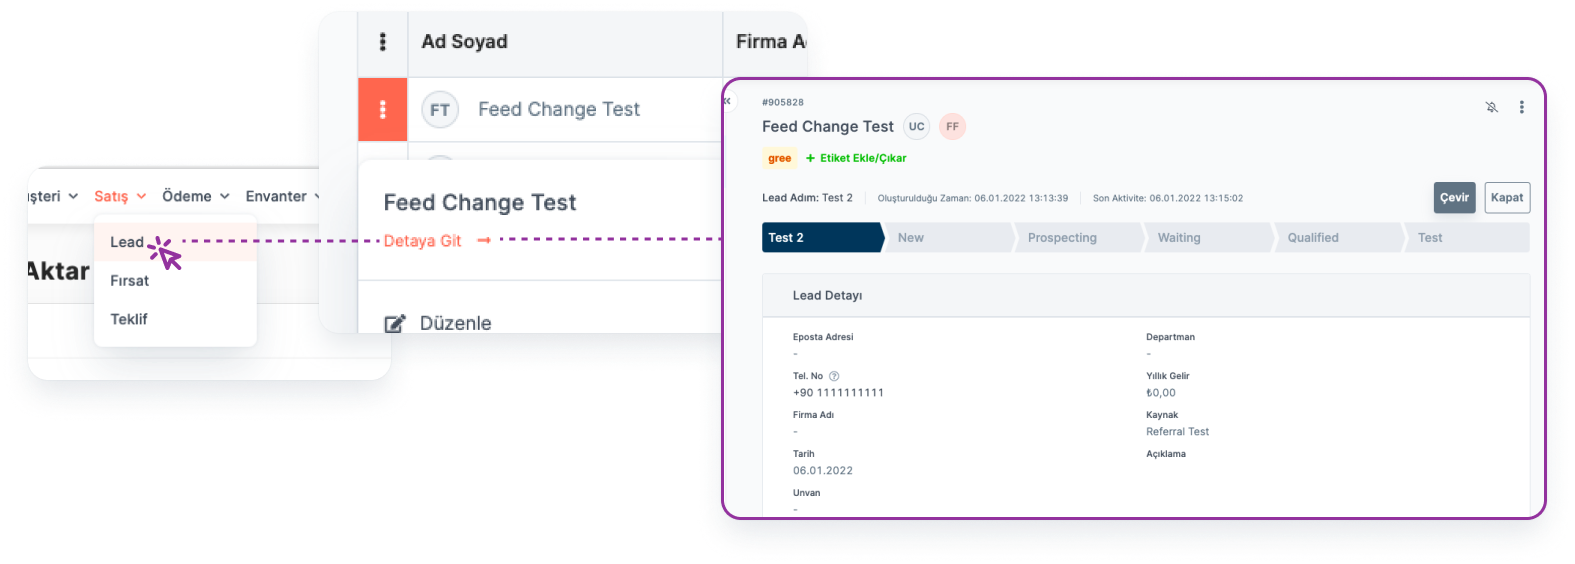
Lead detail can be accessed by clicking the "More" button on the Lead list view page.
Main menu > Lead > More > Drill Down
- Fields in Lead Details:
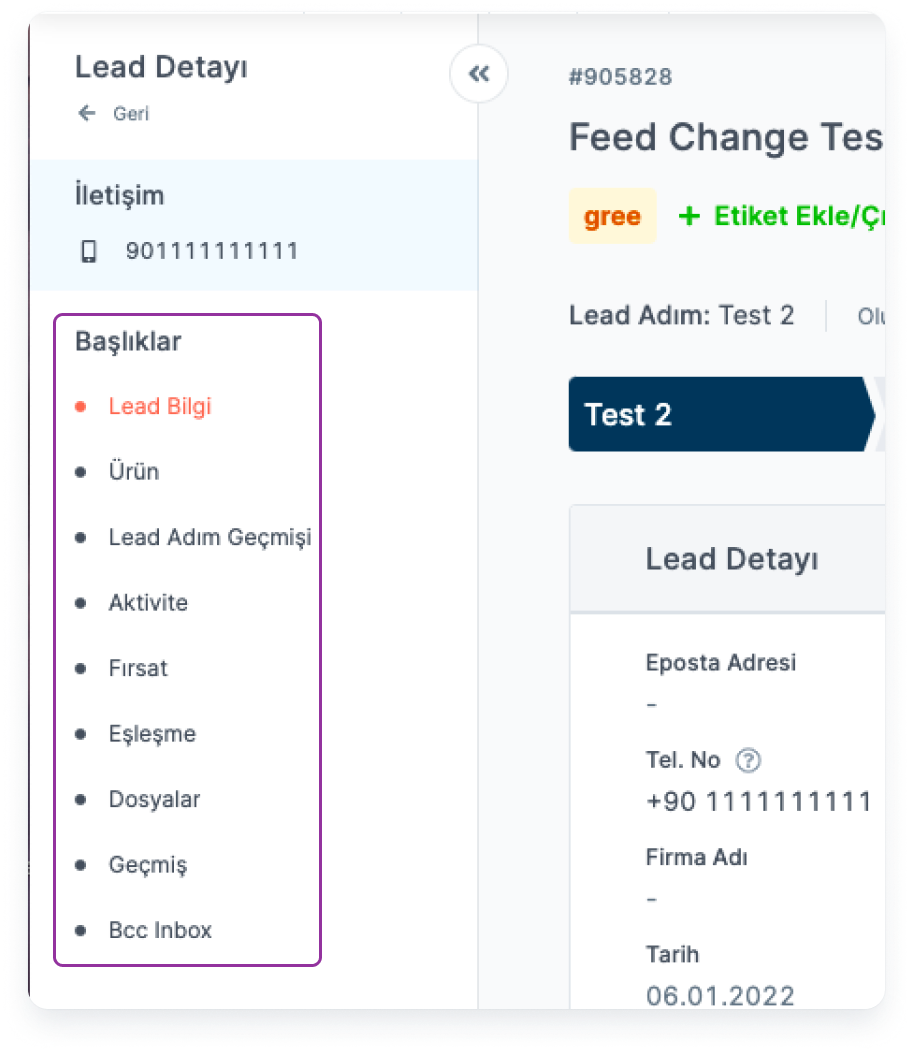
The "Menu" on the left of the page can access the following fields in relation to the Lead:
- Product: This is the field where the products associated with the lead are listed. You can also add products from this area.
- Status History: The stages of the lead and who carried out the transactions can be tracked in this area.
- Activity: Meeting, Task and Call type activities that users associate with Lead are displayed in this area. You can also add an activity from this area. Note: Activity types can be customized by institutions.
More info oabout Module Settings->
- Files: This is the area where the files associated with the lead are listed. You can also add documents from this area. Documents can be previewed, downloaded, authorized and shared via e-mail from this area.
- History: This is the field where the entire process, starting with the addition of the lead, is recorded with the person who performed the operation and the date.
Lead Owner's Permissions
The user who created the Lead is called "Lead Owner" and has the following privileges on the Lead:
Viewing
Arrangement
Deletion
Converting
Labeling
Close the lead
Authorization
Transfer
*Note: Users in the same team can view, edit and delete leads created by different people within the team.*
More info about Authorization->
View and follow the lead
🔒 The user must be in the same team as the "Lead Owner" or "Lead Owner" for this operation. If any of these conditions are not met, authorization must be requested from the Lead owner.
To view the lead detail, follow the steps below:
Main Menu > Lead > Lead Detail
Users who are not a "Lead Owner" must follow the relevant Lead to receive notifications about the Lead.
Main Menu > Lead > Lead Detail > Follow
Editing the Lead
🔒 The user must be in the same team as the "Lead Owner" or "Lead Owner" for this operation.
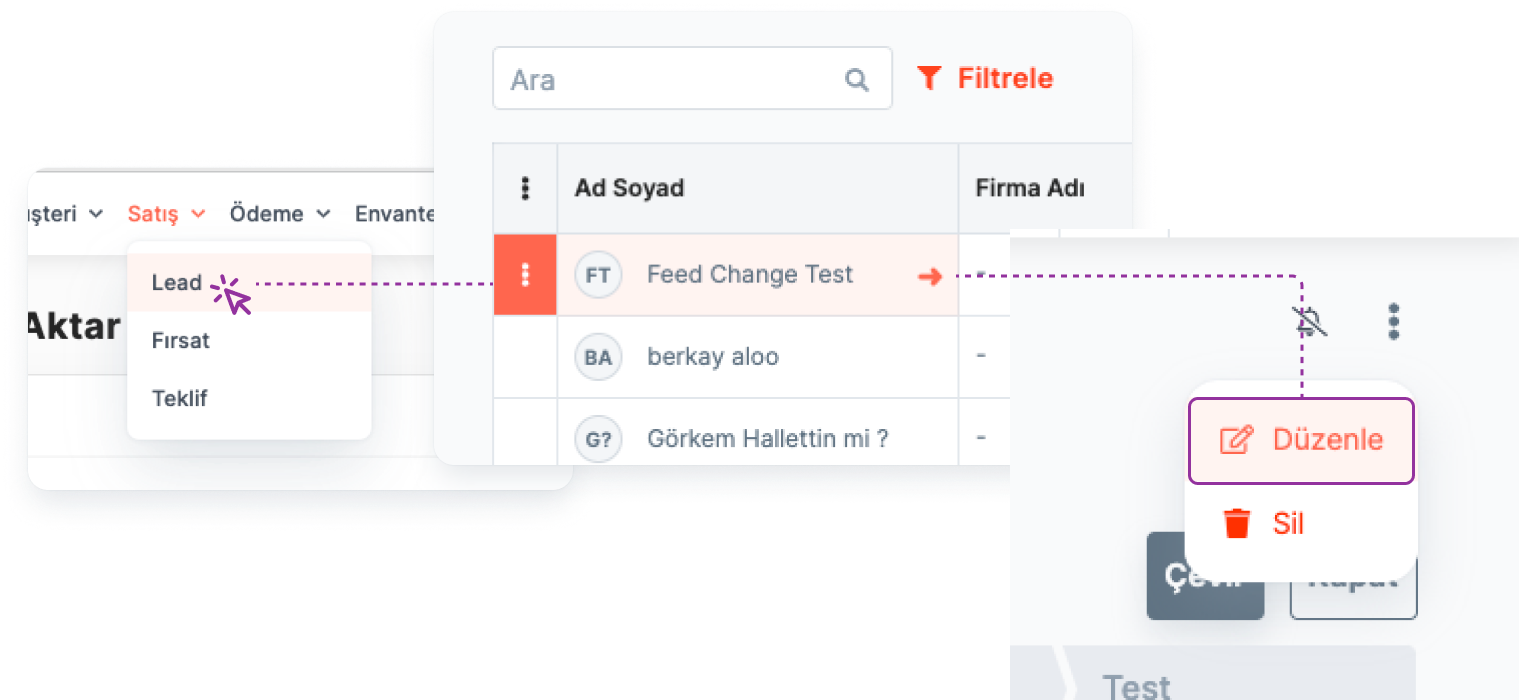
Editing the relevant Lead from the Lead detail:
Main Menu > Lead > Lead Detail > Edit
Delete the Lead
🔒 The user must be in the same team as the "Lead Owner" or "Lead Owner" for this operation.
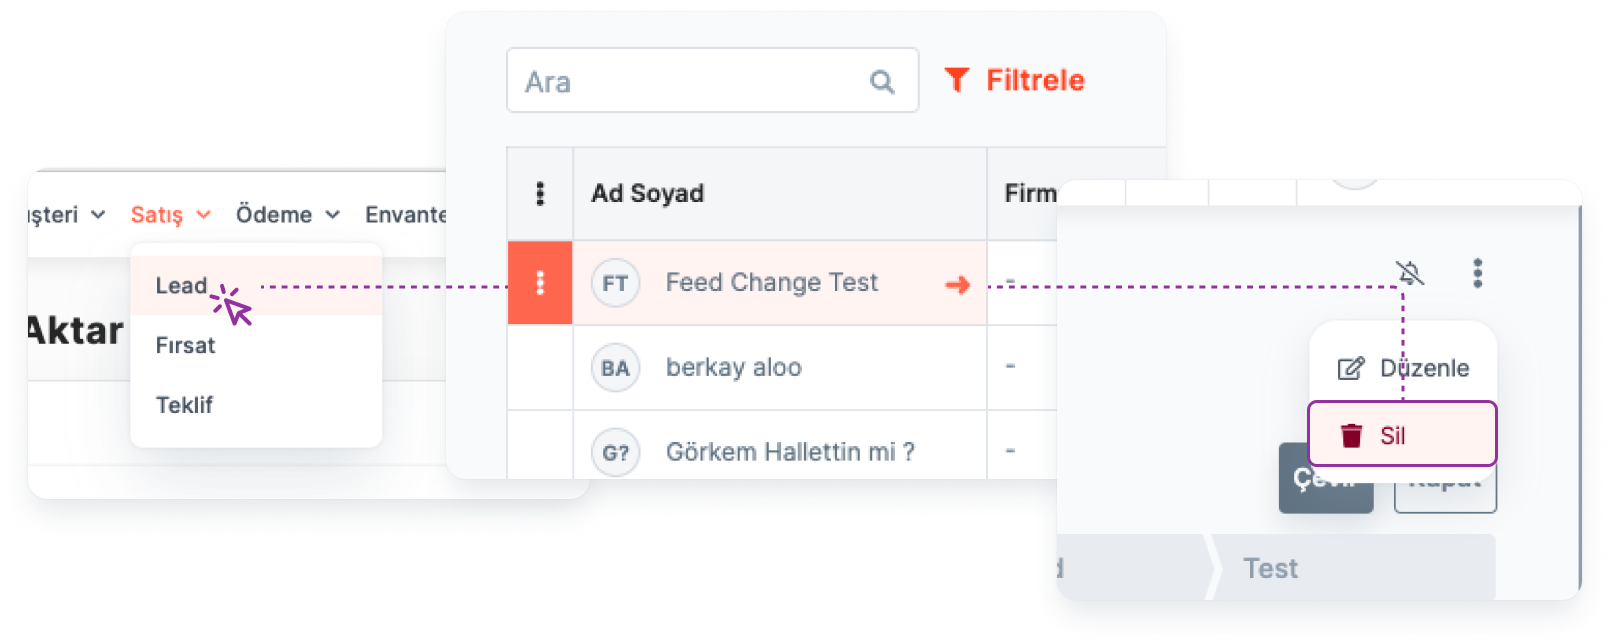
Deleting the relevant Lead from the Lead detail:
Main Menu > Lead > Lead Detail > Delete
Labeling the Lead
🔒 The user must be in the same team as the "Lead Owner" or "Lead Owner" for this operation. If any of these conditions are not met, authorization must be requested from the Lead owner.
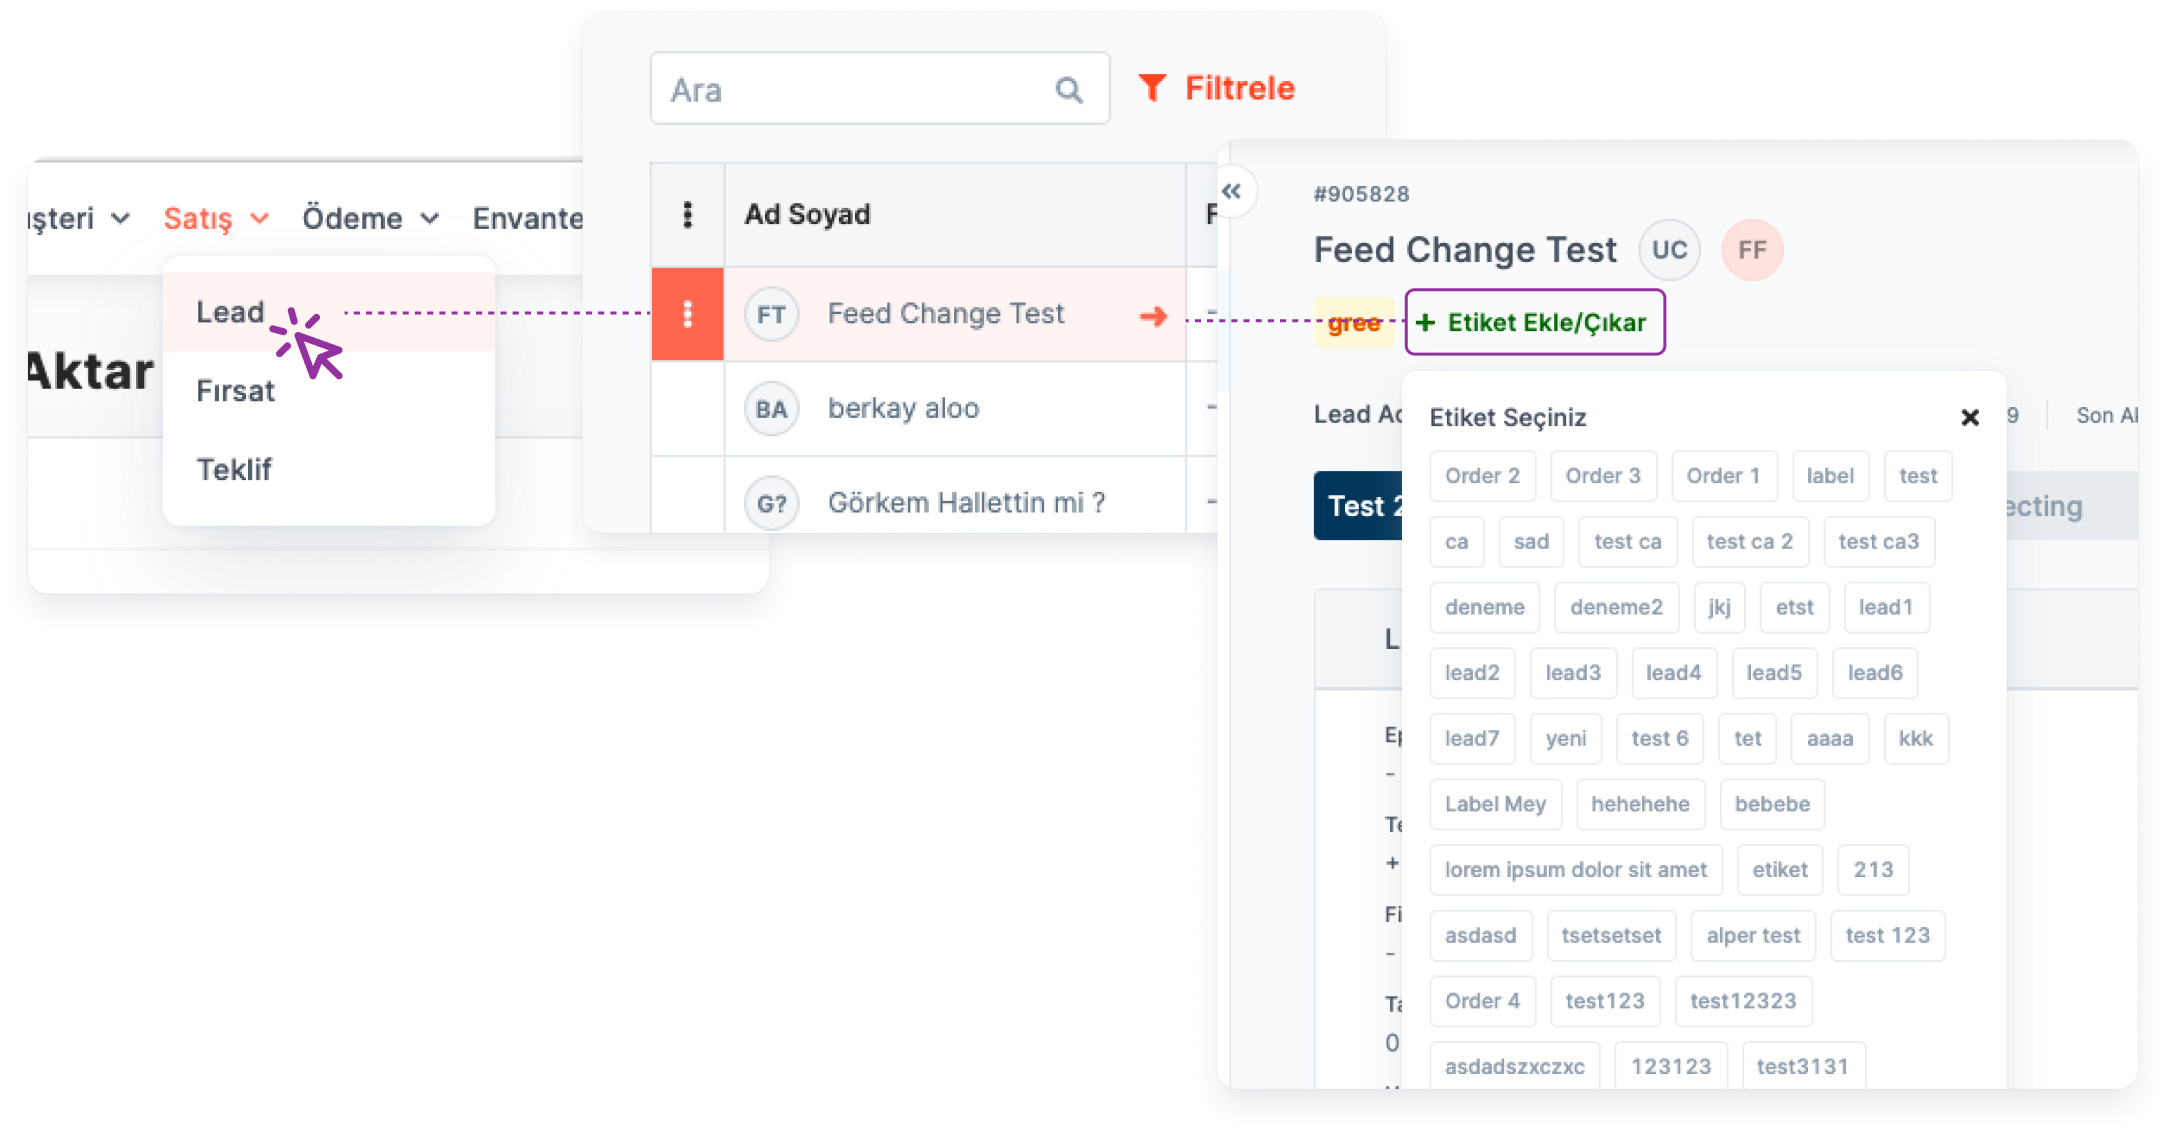
Use Labels to categorize leads.
Main Menu > Lead > Lead Detail > Label
Authorizing Users in Different Teams on the Lead
🔒 User must be "Lead Owner" for this operation.
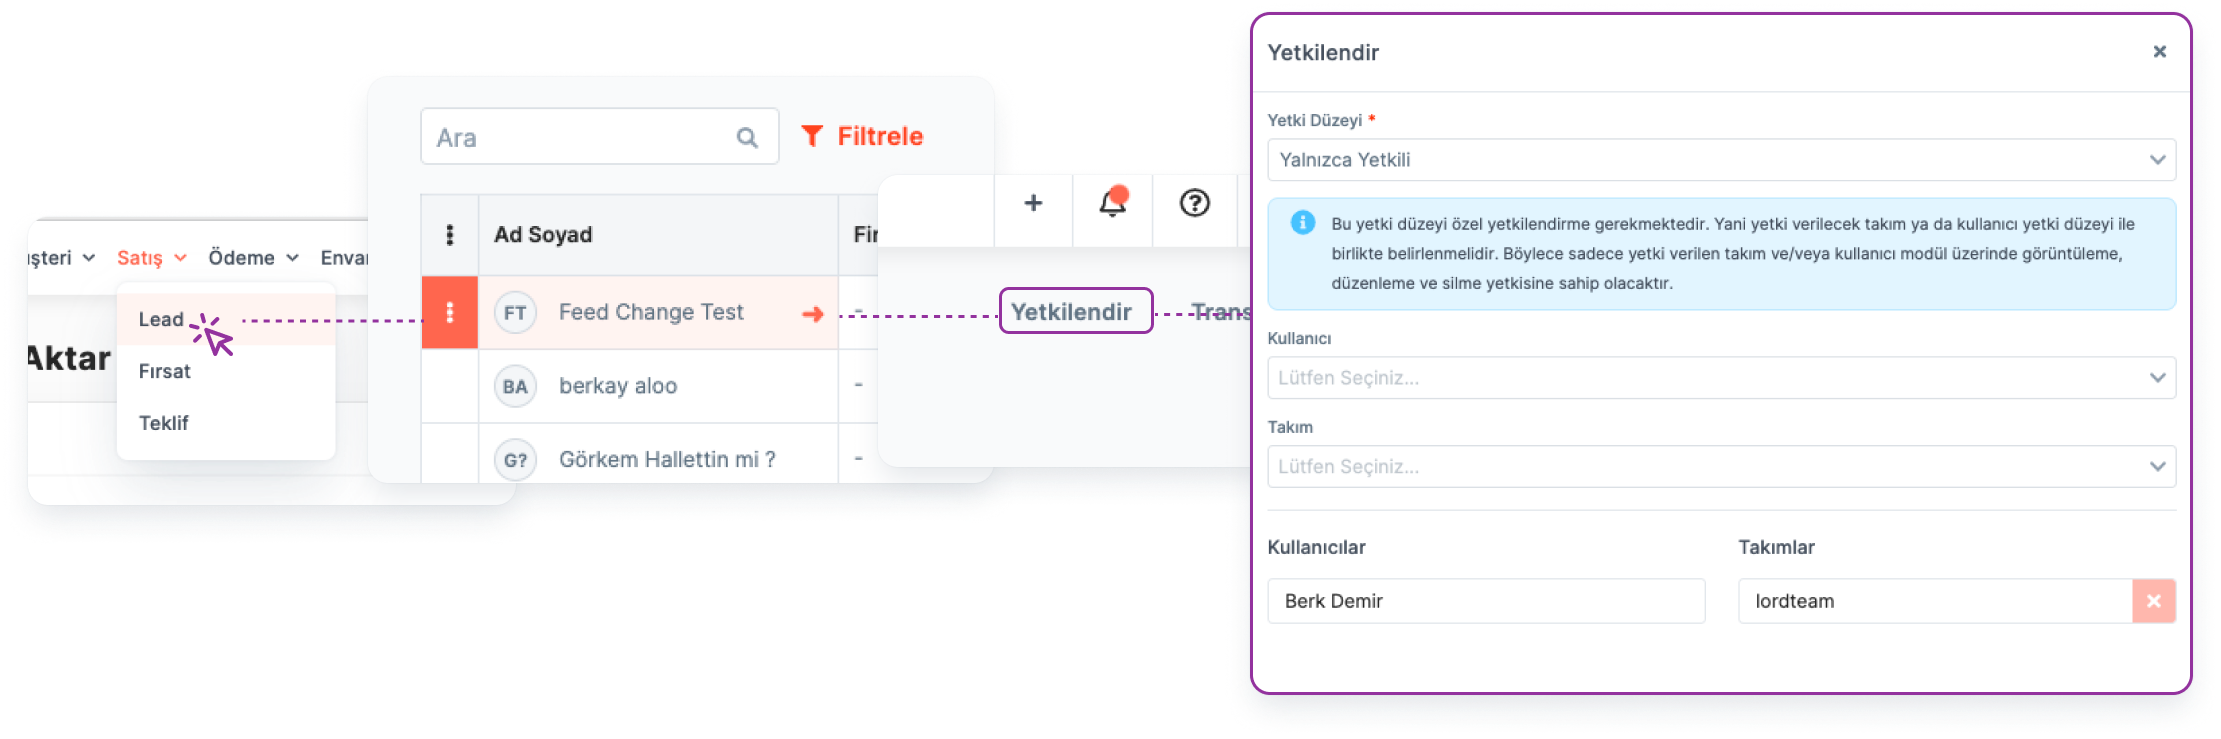
Authorizing the relevant Lead from the lead detail:
Main Menu > Lead > Lead Detail > Authorize
The Lead Owner can authorize users in different teams to:
- Viewing
- Deletion
- Arrangement
- Labeling
- Following
Transfer the Lead
🔒 User must be "Lead Owner" for this operation.
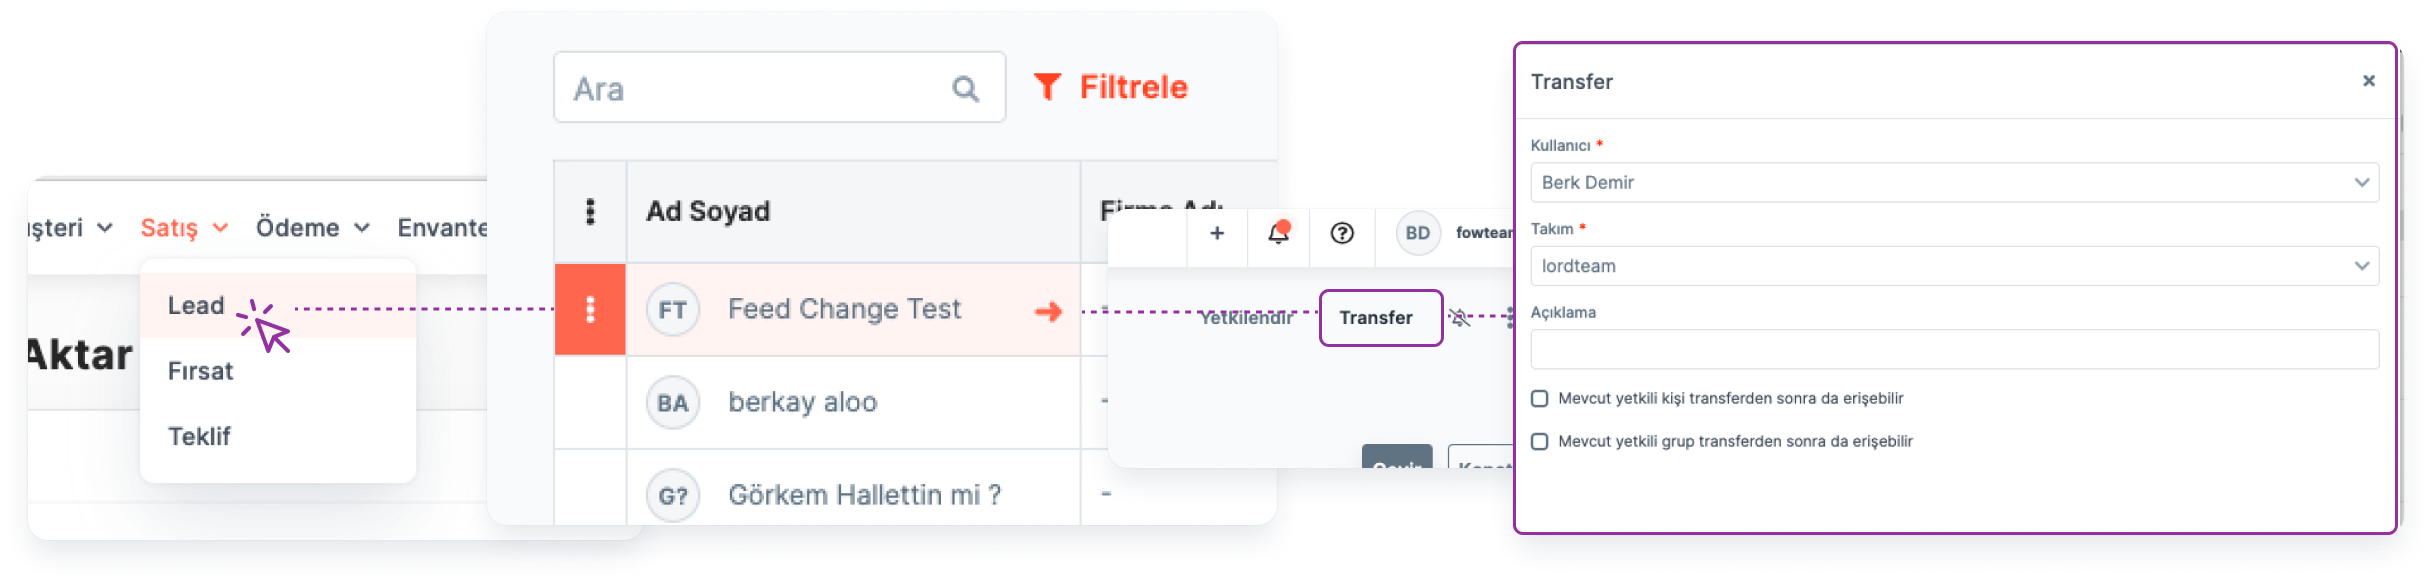
Transferring the relevant Lead from the Lead detail:
Main Menu> Lead > Lead Detail > Transfer
Lead Owner can transfer the created Lead to another user. The user who performs the transfer transfers the right to perform the following actions to the user to whom the Lead is transferred:
- Viewing
- Arrangement
- Deletion
- Converting
- Labeling
- Close the lead
- Authorization
- Transfer
*Note: During the transfer process, the user must request an "Access Authorization" on the Transferred Lead. Otherwise, the user who transfers the Lead after the transfer is complete, loses its viewing authority.*
Fields in the Lead Addition Form
Required Fields:
While creating the lead, you must fill in the following fields:
- Name: This is the field where the name of the contact registered as the lead is entered.
- Surname: This is the field where the surname of the contact registered as the lead is entered.
Non-Required Fields:
Phone. No: This is the field where the phone number of the contact registered as a lead is entered.
Email: This is the field where the e-mail address of the contact registered as a lead is entered.
Date: The date the lead was added. Backward date can be entered.
Account: This is the field where the company to which the person registered as the lead is connected.
Department: Refers to the department of the person registered as the lead in the company to which he is affiliated.
Title: Indicates the title of the person registered with the lead company.
Source: Indicates the source from which the lead came. For example, the created lead might be in one of the following states:
Reference
Phone
Mail
Website
Status: Indicates each step on the lead. For example, the created lead might be in one of the following states:
New
Waiting for response
Discussed
Explanation: This is the field where all the notes about the lead can be entered.
Customizing the Lead Submission Form and Lead Detail Page
🔑 This operation requires admin authority.
Lead form and Lead detail page can be customized according to Account needs.
Customize the lead submission form:
Main Menu > Settings > Customization > Custom Fields > Lead > Add New

*Note: The relevant buttons must be activated during the customization process so that the custom fields you add can be displayed on the Lead addition form and on the Lead editing page.*
More info about Custom Fields->
Write a Post to the Lead Feed
This is the field where users with viewing authority on the relevant Lead write a post to the Lead. Thanks to this area, users can communicate with each other on a Lead-specific basis.